Topics
Get your queries resolved
To effectively manage communication and address queries in the construction industry, our product provides a user-friendly interface for creating RFIs. Here’s a step-by-step guide on how to create an RFI using our tool:
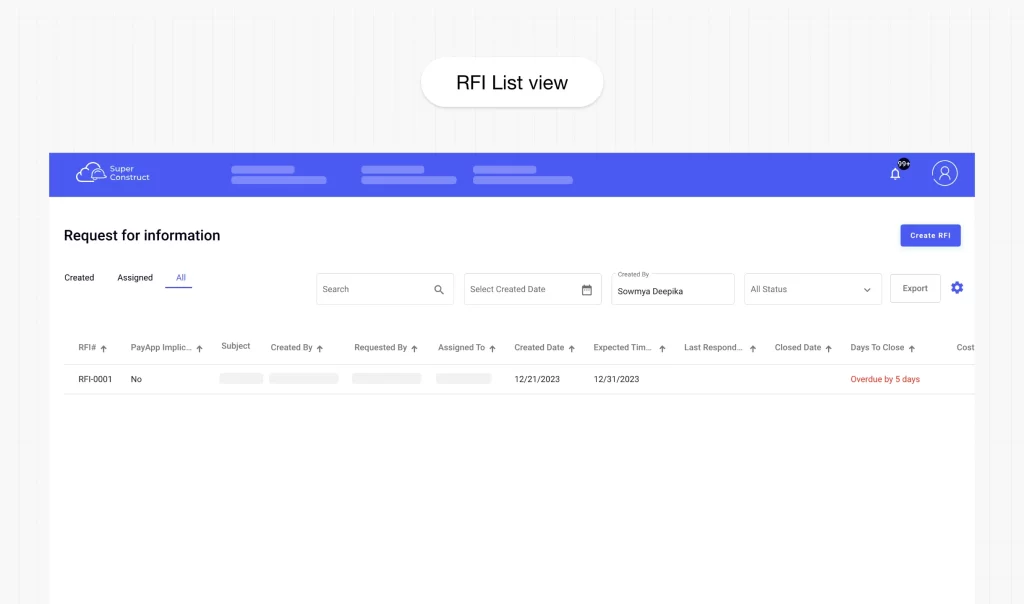
1. Access the RFI Module:
Open our product and navigate to the RFI module.
On the landing screen, known as the RFI Summary table, you will find an overview of existing RFIs.
2. Click on the “Create” button:
Locate the “Create” button on the RFI Summary table and click on it to initiate the creation of a new RFI.
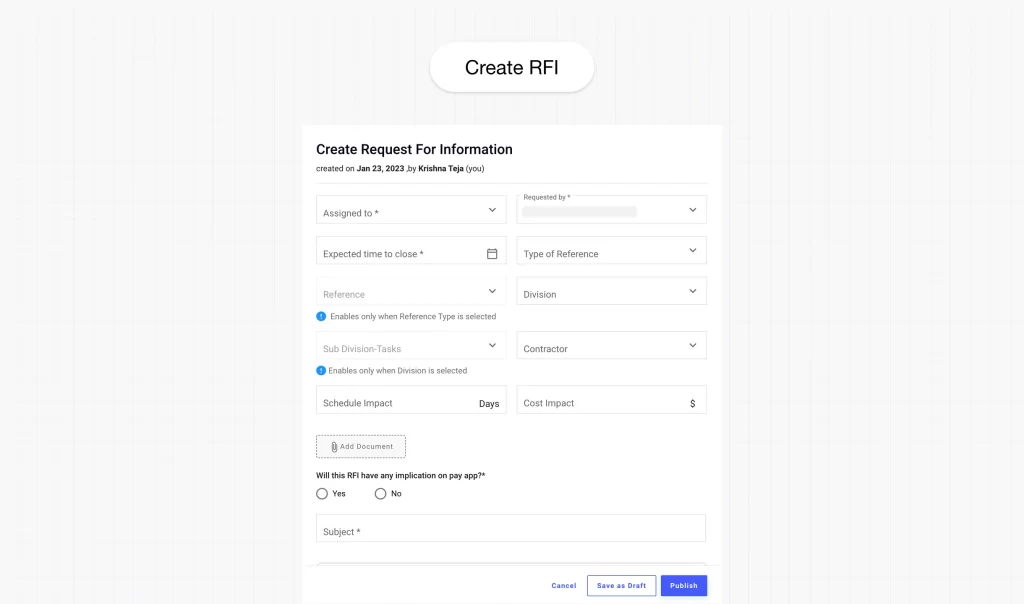
3. Fill in the Mandatory Fields:
Assigned to: Select the person responsible for addressing the RFI.
Requested by: Choose the person who is submitting the RFI.
Expected time to close: Select the desired date for closing the RFI.
Will this RFI have any implications on Pay App?: Indicate whether the RFI may affect the pay application process by selecting either “Yes” or “No.”
Subject: Provide a concise and descriptive subject for the RFI.
Description: Add detailed information and context regarding the RFI.
4. Choose RFI Access:
Public: Select this option if you want the RFI to be accessible to everyone involved in the project.
Private: Choose this option to customize the accessibility of the RFI, selecting specific individuals or teams who should have access.
5. Fill in Optional Fields (if applicable):
Type of Reference: Specify the type of reference related to the RFI, if applicable.
Reference: Provide additional details or documentation that can assist in understanding the RFI.
Divisions: Select the relevant divisions associated with the RFI.
Subdivisions/Task: Choose the specific subdivisions or tasks related to the RFI.
Contractor: Specify the contractor involved, if applicable.
Schedule Impact: Indicate any potential impacts on the project schedule resulting from the RFI.
Cost Impact: Mention any potential cost implications associated with the RFI.
6. Review and Publish:
Once you have filled in the necessary information, review the RFI details to ensure accuracy and clarity.
Click on the “Publish” button to create and publish the RFI. This will make it available to the relevant stakeholders for review and response.
7. Save as Draft (Optional):
If you are unsure about publishing the RFI immediately, you can choose the “Save as Draft” option. This will save the RFI locally within the tool, allowing you to revisit and edit it later before publishing.
8. Cancel (Optional):
If you decide to discard the creation of the RFI, you can select the “Cancel” button to exit the creation process without saving any changes.
By utilizing our RFI creation feature, you can streamline the information exchange process, seek clarification, and ensure effective communication among project stakeholders.