Topics
Folder/File Management
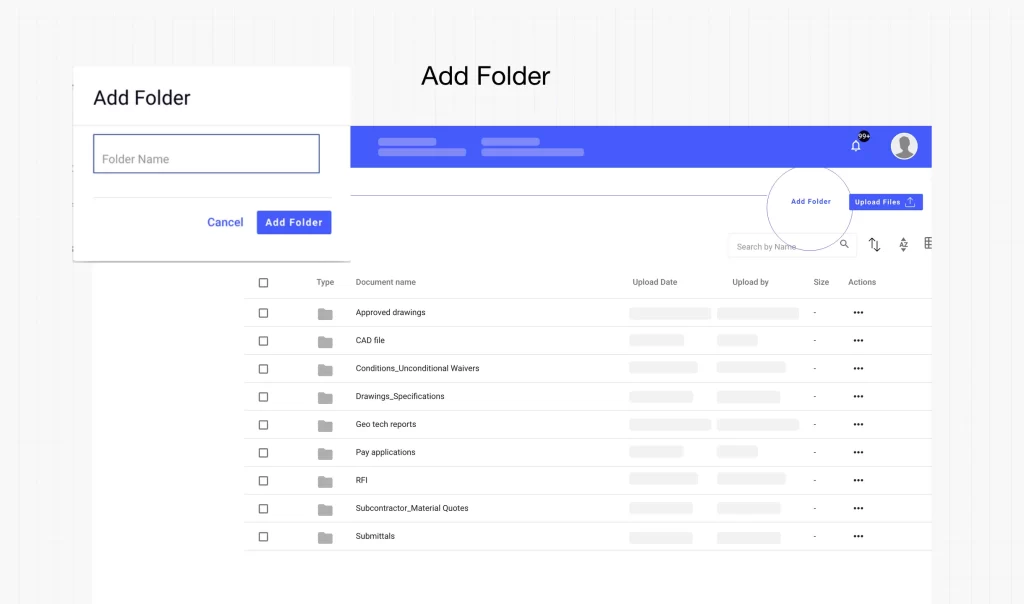
Creating a Folder:
All members of the project team have the ability to create folders and subfolders within the Documents module.
To create a folder, click on the “Add Folder” button located in the top-right section of the Documents module.
A pop-up window will appear, prompting you to enter the desired folder name.
Enter the folder name in the provided field and click “Add Folder” again to create the folder.
If you decide not to create the folder, click “Cancel” to dismiss the pop-up.
Uploading Files:
Uploading files can be done either without creating a folder or into an existing folder.
To upload a file, click on the “Upload File” button located in the top-right section of the Documents module.
A file selection window will appear, allowing you to choose files from your local system’s drive.
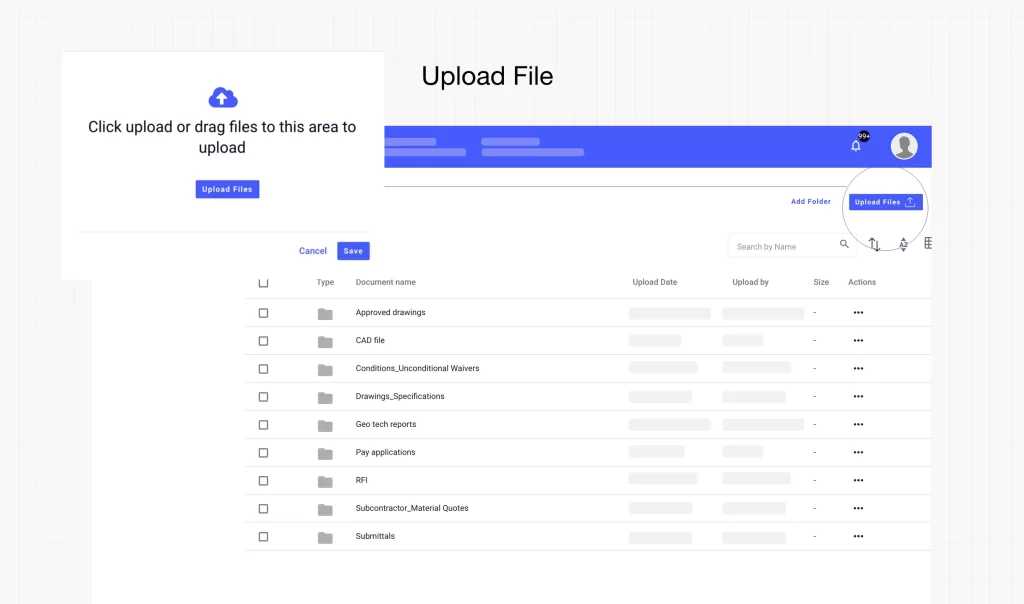
You can select multiple files to upload simultaneously by using the appropriate file selection method.
Once you have chosen the files, they will be displayed in a pop-up screen that asks for confirmation to save the files.
If you have more files to upload, you can click on the “Upload Files” button in the pop-up to select additional files.
To save the selected files in the Documents module of the project, click on the “Save” button.
If you decide not to upload the selected files, you can click on “Cancel” to disregard the file upload process.
By providing the ability for all project team members to create folders and upload files, our Documents module promotes collaboration, efficient file organization, and easy access to important project documents.